Passenger Footlight Mounting Bracket

This bracket is designed to mount an OEM LED Footlight from a later VW/Audi into the Mk IV Golf or Jetta/Bora passenger side footwell.

The bracket is cut from 3 mm aluminium sheet using a water jet and is professionally bent.

The bracket is designed to use the same OEM spring clip and T20 torx screw as those used to secure the glovebox and trim panels to the dash frame.

Installation only requires the drilling of one new hole for the new bracket in the dash frame, together with attendant wiring for the footlight.

Brackets are available for both Right Hand Drive and Left Hand Drive vehicles for passenger side mounting only.

To install a footlight on the drivers side merely requires a suitable hole to be cut in the plastic kickpanel above the foot pedals in your location of choice.

If you wish to purchase a bracket, please email me via "CONTACT" link at the top of this page.

NOTE: Bracket is supplied without LED light, spring clip and torx screw and may also require some minor file finishing to smooth edges.

Installation

Note: All photos below show the Right Hand Drive installation. I obtained a piece of dash frame from a wrecking yard and removed glovebox for photo clarity only. Neither of these parts need to be removed from the vehicle for actual installation!

Remove six screws securing glovebox to the dash frame. There are three screws along the bottom and three inside along the top of the inner liner when you open the glovebox door. There is also seventh screw hidden under the centre console. This does not have to be removed.

The glovebox can be pulled away from the dash frame sufficiently to drill the required extra hole in the dash frame.

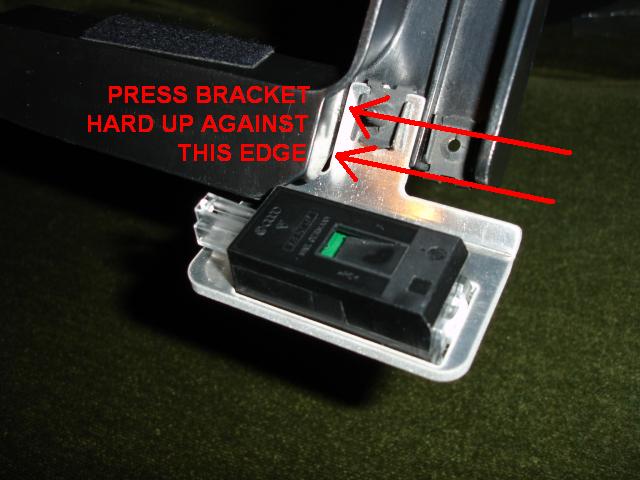
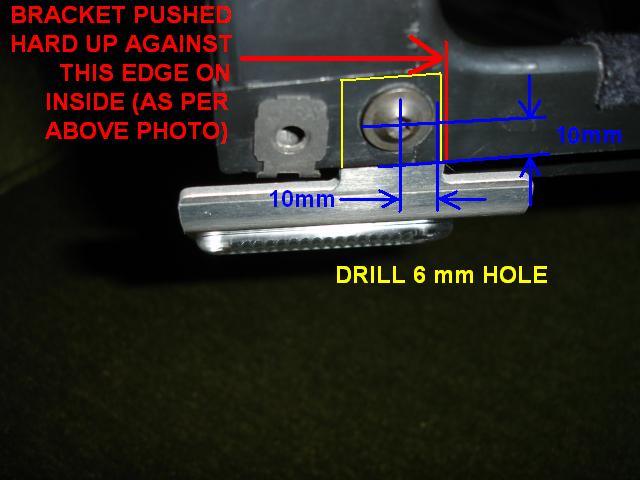
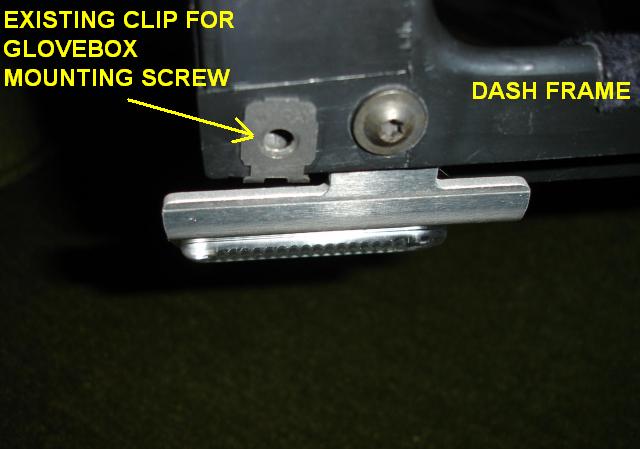
Carefully measure the location of the mounting hole as per photos below.

This location has been carefully selected to give best lighting effect and clear all under dash obstructions.

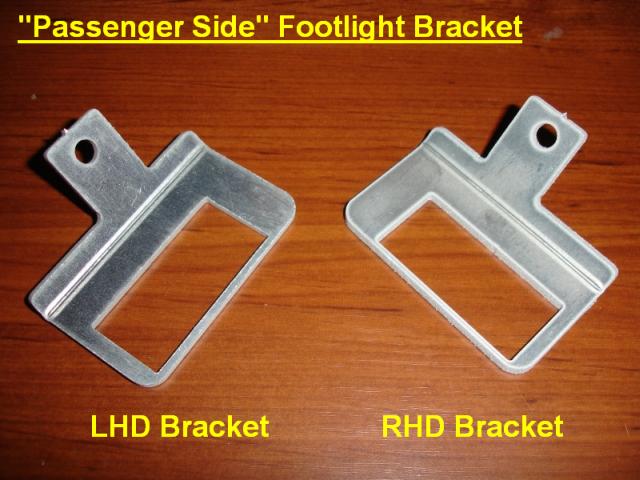
If you wish, this bracket can be installed anywhere along the lower passenger dash frame piece, bearing in mind the clearance to the climatronic airbox etc in that area.

Right Hand Drive cars:

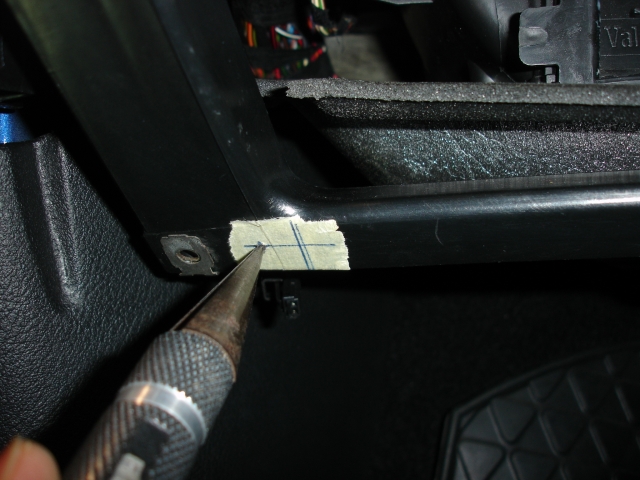
This is how I actually marked and drilled the hole.

Put some tape in approximate location and carefully measure and mark the hole position:

I used an awl to mark the hole for the drill bit:

Drill final hole. I put a piece of vacuum hose over the drill bit leaving only about 10 mm of drill tip sticking out of the end. This stops the drill bit from breaking through the hole suddenly and possibly inadvertently drilling a hole in something else as well!:

Left Hand Drive cars use mirror imaged views of above.

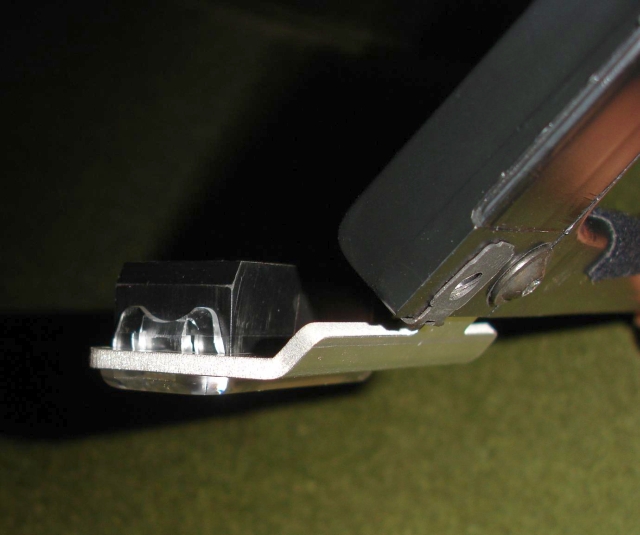
Install spring clip onto the new bracket as per photo:

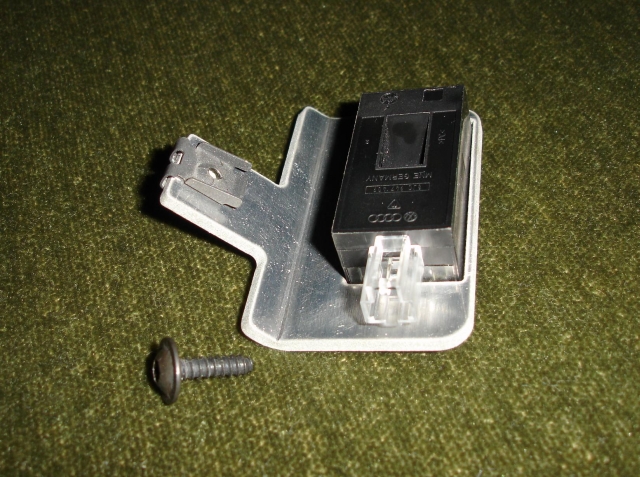
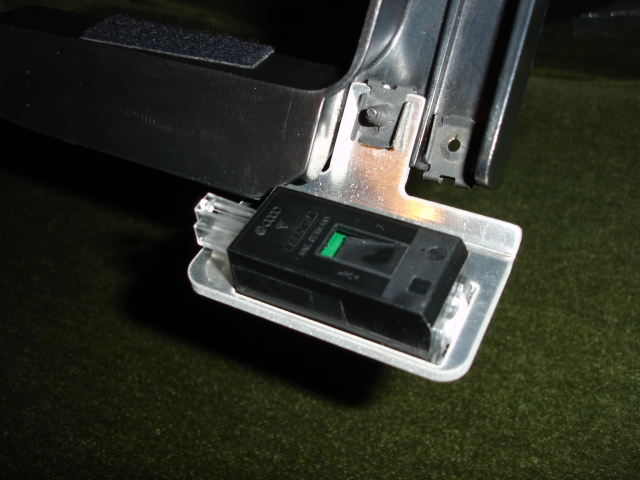
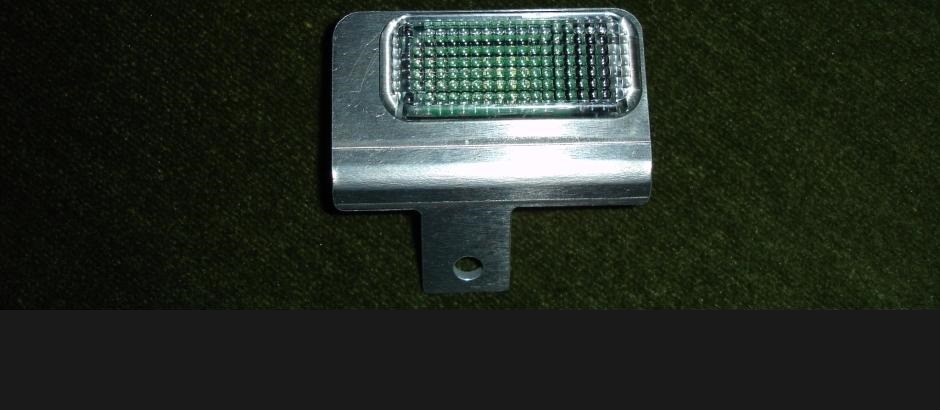
Fit light into bracket. Note that the light needs to to clipped in as per the photo with the plug towards the centre of car. If installed the other way around the plug will hit on the lower A-pillar trim.

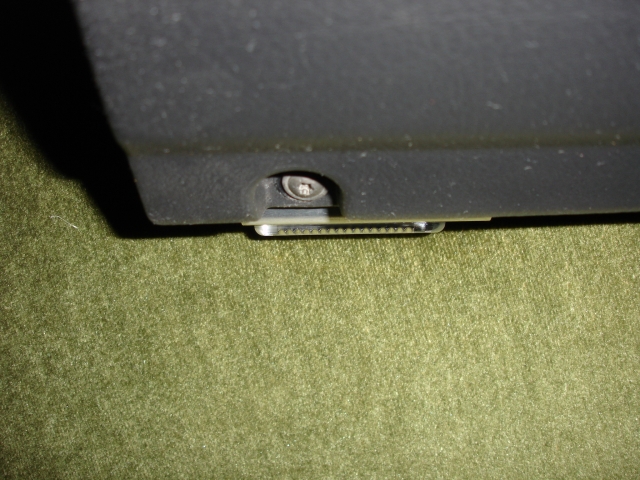
When light is mounted in bracket, simply use torx screw and secure the bracket to the rear of the dash support frame. The bracket sits behind the dash frame in the position shown in the photos below:

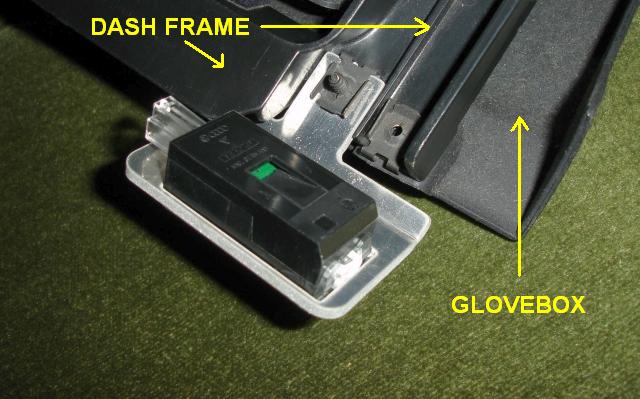
Bracket and light mounted in car:

You will note that when the glovebox is secured to the frame that there is a sufficient void under the glovebox trim to allow for clearance of this new torx screw:

Final position of the light when the glovebox trim is in place:

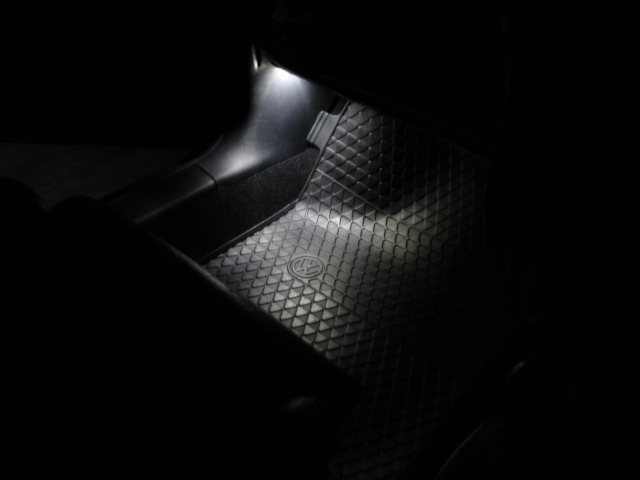
The effect at night with the 8J0 947 409 LED fitted:

Parts List

The OEM light housings that use normal incandescent bulbs will not fit this bracket tightly as they require a slightly different sized hole approximately 1 mm smaller

Volkswagen are continually bringing out different versions of LED light housings, but the bracket is designed for these listed versions only. I have not tested or measured any other versions.

These are the LED light housings that are known to fit the bracket:

4E0 947 415           Quite dull with a subtle effect

8J0 947 409            About twice the brightness of the above

8J0 947 409 A         This is the Audi R8 Luggage Compartment Light and is extremely bright!

Other parts:

4B0 971 832            2-pin Connector for LED housing

000 979 009 E         Repair wire for connector

N 906 986 06           Hexagon socket head panel bolt 4.2x16

N 906 988 01           Speed nut 4.2x16x12

Wiring for this LED connector is:

Pin 1 = negative

Pin 2 = positive

Connection to vehicle wiring depends on which features you desire. For example, use the following schematics:

LED Footlights ON with Door Open/Unlock plus Switchable Anytime with Manual Switch

LED Footlights ON with Door Open/Unlock plus Switchable Anytime with Manual Switch PLUS Mirror Puddle Lights

Return to Top

Return to Home Page